Saturday, March 1, 2014
Our Farmhouse Kitchen


A few months ago we put up the final piece of trim, so to speak, in our kitchen. As its been a little by little, step by step project the past few years, I cant tell you what a wonderful feeling that was! Many of you have seen pictures of our kitchen already, and really little has changed, other than the east side of the kitchen where the range sits. But Ill go ahead and show photos of the entire kitchen this time, all in one post, and include links to previous posts about the kitchen projects.
BEFORE:

You may remember this photo of what the kitchen looked like when we did the first walk through of our home. Dreary, outdated, and crowded with very little useable space. I do cringe every time I see this photo - we definitely had the work cut out for us, all with other priorities and a budget!
AFTER:

After removing the cardboard ceiling tiles, the original beadboard ceiling was revealed, and we then painted, painted, painted. We left the original cabinets, as they were solid oak and in great condition. We installed new hardware, and still my favorite, reclaimed wood countertops from 100 year old barn wood that my husband, Justus, and father-in-law built. I think that was a true example of the power of paint, as it truly transformed the room with very little cost.
(You can read the original kitchen post here.
You can read more about painting cabinets here.)

Once the cardboard tiles were removed, it left a little gap between the cabinets and the ceiling, so we installed trim to bridge the gap and give a cohesive look. Last year we installed new flooring in the kitchen and laundry room.

The cast iron enamel coated sink is original to the house and last year we refinished it, and installed a new faucet as well. Justus and I always strive to use or restore original parts of our home as much as we can (although not always possible) - I love this old sink, especially since it has a connection to our farmhouse. I think it definitely set the tone for what I envisioned for our kitchen.
(You can read more about the sink project here.)

This is a corner of the west side of the kitchen, after entering from the dining room.

Recently Justus built a reclaimed wood shelf with pegs for this wall to match the wood shelves on the opposite side of the kitchen and to give us some additional storage. (Since the dishwasher is located here, we wanted to leave plenty of clearance on the lower half of the wall.)

BEFORE:

This is the east side of the kitchen, and an area Im not sure that Ive ever shown much. This really shows that although the kitchen is a nice size, only half of it had cabinet and countertop space. Needless to say, when we moved in, I really had to go through every little thing, only keeping those items that we truly needed. For a long time I cooked in that tiny little corner to the right of the stove!
AFTER:

I could not wait to tear out the old ineffective range vent! Justus removed the little cabinet above the range and built a custom range hood with a fan that vents outdoors. I laugh while I write that, because it sounds so simple, but Justus had his work cut out for him on that project for numerous reasons.

Not only was it a functional addition - one I use every day - but it also improved the kitchen aesthetically, particularly since one has this view clear to the front entrance of our home.
We also purchased a new range last year. I had this model picked out for a long time! Since I couldnt afford a Viking, this was the best alternate option (wink - wink). It has three racks for cooking, a convection option and I love its large window.

Justus installed the pine planking horizontally as backsplash to match the rest of the new additions in the kitchen.
(To read more about our reclaimed wood butcher block countertops, click here.
To read more about caring for butcher block countertops, click here.)

BEFORE:

This is the other half of the east wall. When we moved in, we turned our refrigerator so it was facing the other way and brought in a large table, but it was only last year that we finally found a solution to adding some additional built in space.
AFTER:

The first step was building a built in cabinet around the refrigerator. From there, Justus built an open lower cabinet and we purchased 8 of oak butcher block from Ikea.
(You can read more about the built in refrigerator cabinet here.)

Having this additional countertop space has made me love our kitchen! Finally I could get out of that little corner for cooking and it made a world of difference. Our kitchen feels spacious and so much more open.
(You can read about building the lower cabinet and installing the countertop here.)

(This is my view out the window here - I love to check on our chickens throughout the day while Im cooking.)

When we purchased a new range, we went ahead and purchased a new matching refrigerator as well (both from Maytag). I know most are fond of stainless steel, but somehow Ive just always loved white appliances and it seemed more fitting for our kitchen.

A while back, we also built open reclaimed wood shelving next to the refrigerator cabinet. I refer to this part of the kitchen as my baking section. Its convenient to the pantry too, which is nice.
(You can read about the reclaimed wood shelving project here.)
BEFORE:
And finally, this is the other side of the west wall, which leads into the laundry room.
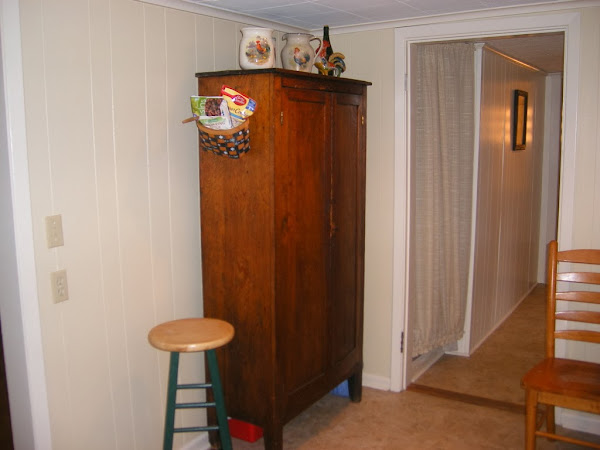
AFTER:

This is an area we didnt do anything other than add some furniture. While I love our built-in additions, these two stand alone pieces seem fitting for a farmhouse kitchen. The large white beadboard cabinet came with us in our move, and it fit perfectly in this corner and works great as a pantry. Ive always felt like it was meant for that corner!

I kind of think of the wood cabinet as an extension of our pantry... it (lately) stores canned goods on the shelves and hides snacks and storage containers inside.

Thanks for touring our kitchen! I know Ive probably exhausted you with all these photos and talking (smile). There is nothing in our kitchen that is perfect - but, although challenging, we embrace the imperfections of living in an 80 year old farmhouse and try to make choices in our projects that fit the style of our home. The kitchen truly is the heart of our home, and I hope that it gives feelings of warmth, comfort, simplicity and functionality.
If you have any questions, feel free to leave a comment and Ill do my best to answer!
If you have any questions, feel free to leave a comment and Ill do my best to answer!

Subscribe to:
Post Comments (Atom)
No comments:
Post a Comment